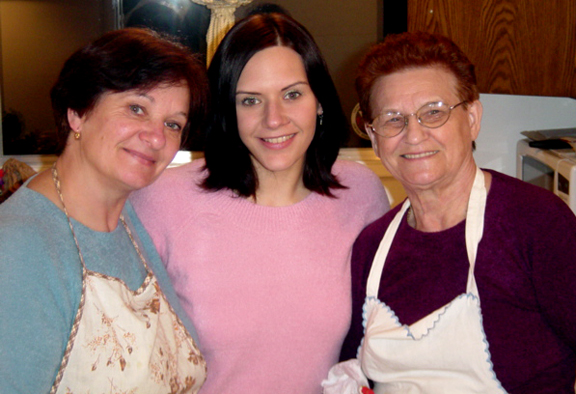
Today is my Baba’s (Claudia’s Mom) 82nd birthday. There really isn’t a better way to celebrate her life (and Claudia’s essentially) than to post the staple of my Ukrainian childhood (and the best food she ever made) on this day. That being perogies. No one, and I do mean no one, can ever top my Baba’s perogies. They are simply the best. I know there are a lot of you who say the same thing about your own family recipe. But I kid you not, my Baba made and sold hundreds (if not thousands) of dozens of these little nuggets of gold for people just like yourselves after they realized they did not have the best family recipe. Trust me on this one. I grew up on this stuff after all!
Claudia and I spent all Saturday afternoon perfecting the dough and creating dozens of differently filled perogies. We finally came up with what we thought Baba would deem as worthy to share with friends. Perogies are the ultimate comfort food. I have never grown tired of them. My hope is that after trying these for yourself, you won’t either.
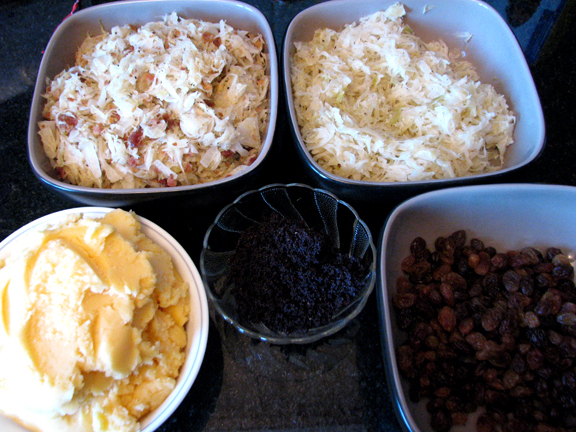
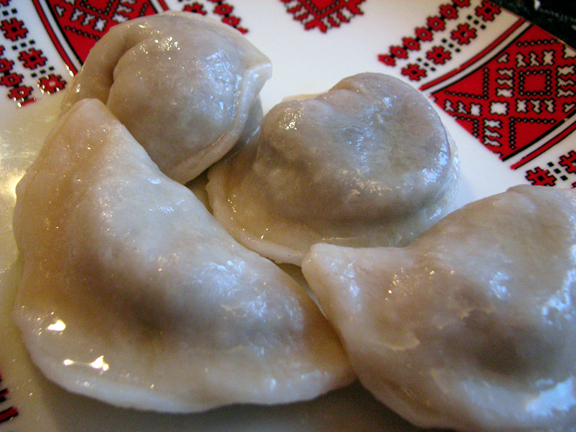
You can make perogies with any type of filling you want. I’ve had cottage cheese, blueberry, poppyseed, chokecherry, you name it! But the best and most favourite fillings I grew up on are as follows:
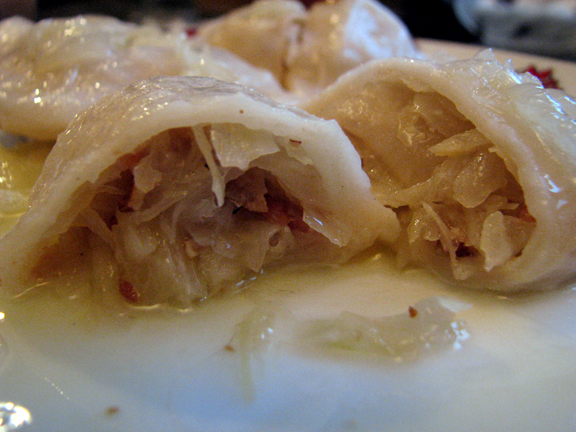
Sauerkraut with bacon (my second favourite)
Sauerkraut without bacon (for a meatless dish for Christmas Eve)
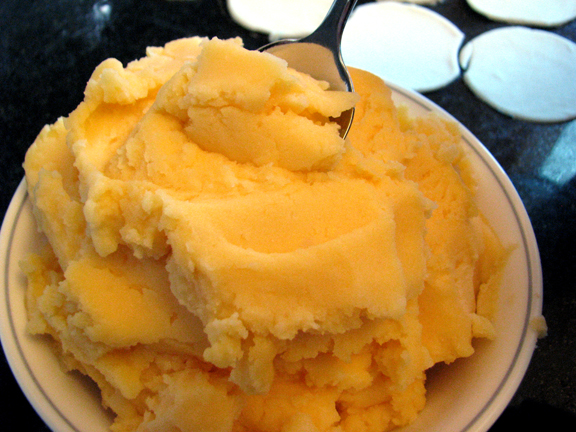
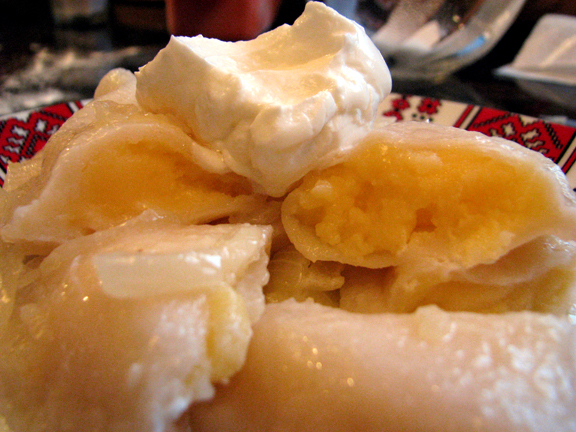
Potato and cheese (the most common, most favourite, and most delicious!)
Poppyseed (Claudia’s favourite – she is the only one who eats them in our family!)
Raisin (a little sweet for my taste but still very nice)
Prune (not shown in above picture – not too sweet but delicious!)
To make the sauerkraut filling you need:
1 quart sauerkraut
4 strips of bacon, diced
1 medium onion, chopped
1/2 cup vegetable oil
1/2 tsp salt
1/4 tsp pepper
Cook sauerkraut, about 20 minutes or until done. Drain and press out water. Saute onion and diced bacon in oil until golden. Add sauerkraut, salt and pepper. Fry for 10 minutes. Cool before using as filling.
For raisin filling:
1 cup raisins
1/2 cup water
1/4 cup sugar
Boil fruit for 20 minutes. Drain and cool before using as filling.
For prune filling:
1 cup prunes
1/2 cup water
1/4 cup sugar
Boil fruit for 20 minutes. Drain and cool before using as filling.
For potato filling:
1 medium onion, chopped
1/4 cup butter
3 cups cooked potatoes, mashed (reserve water used while boiling potatoes)
1/2 tsp salt
1/4 tsp pepper
1 cup grated cheddar cheese
Saute onion in butter, add to mashed potatoes. Add salt, pepper and cheese. Mash well. Cool the mixture completely until using as filling. Yields about 5 dozen perogies.
For the dough:
8-9 cups flour, plus more for dusting and adding
1/2 cup vegetable oil
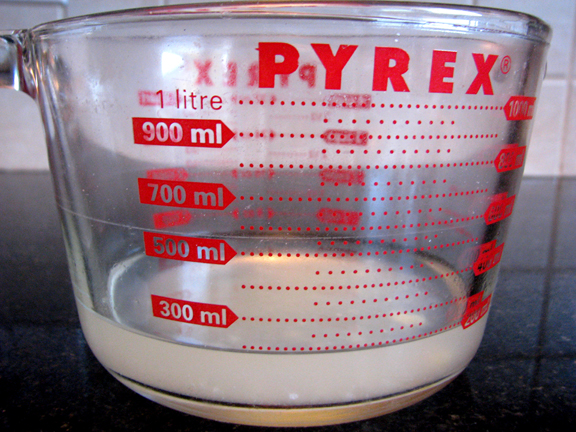
1.5 cups lukewarm potato water
2.5 cup plain lukewarm water.
1 tsp salt
Exhibit A: potato water!
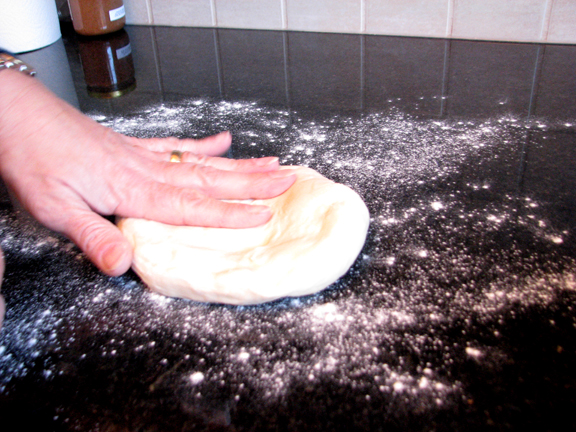
Combine the above ingredients.
If you find the dough is very sticky, continue to add small amounts of flour until it easy to work with and smooth.
You can also separate it into four quarters and add little amounts of flour to each quarter to ensure it is all consistent and not sticky in the middle.
Knead a bit and allow to stand for at least 1 hour before rolling out dough (very important and key to soft dough).
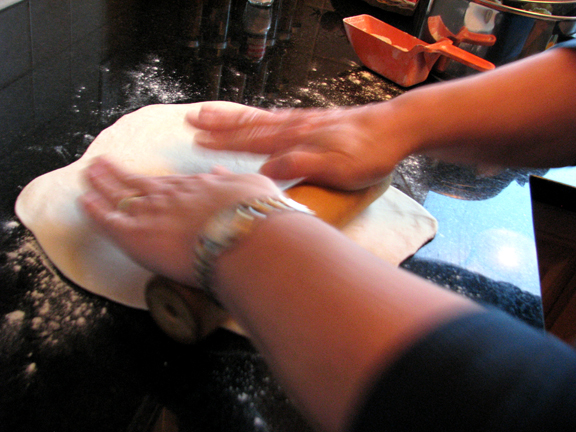
After your dough has rested for over 1 hour, take a piece of it and begin to roll it out into a thin sheet on a floured surface.
Claudia did not allow me to do this initially. It was almost like I had to earn her trust in the perogy-making process before she would allow me to participate fully. You’ll understand why shortly.
Note – wrap the dough currently not being used in plastic wrap and then cover with a damp towel to ensure it does not dry out.
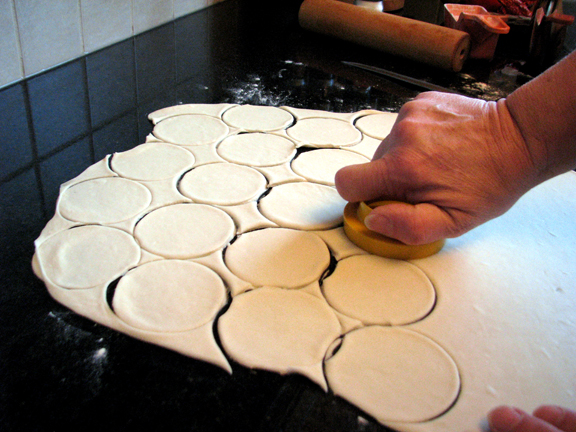
Using a disk-shaped cutter, press out as many circles of dough as possible.
Now the folding process. It is here where it doesn’t look extremely difficult. Actually, Claudia made it look so easy. I dropped 3 on the ground my first shot at this. That is how I essentially lost her trust, hence no dough rolling for me.
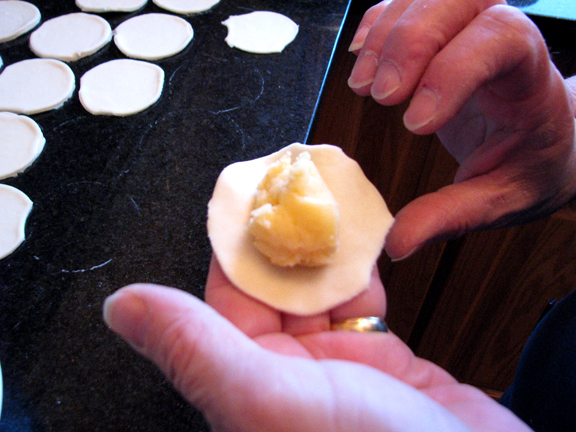
Place filling in the center of the dough. Be careful not to overfill or have any of the filling touch the edges, as this will not allow for them to adhere and they will break open in the cooking process.
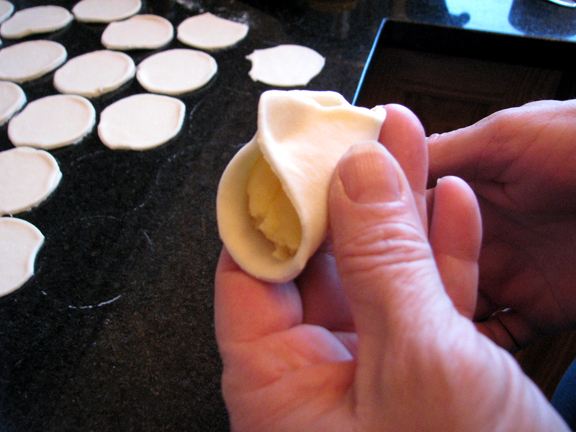
Fold.
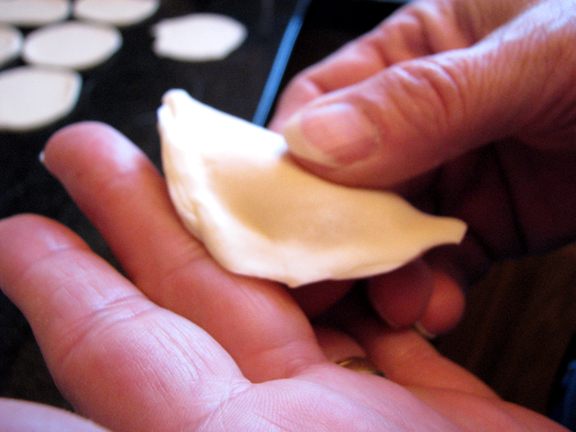
Pinch edges around – hard!
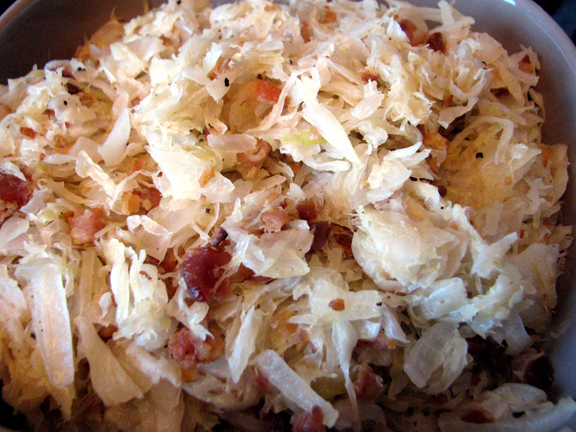
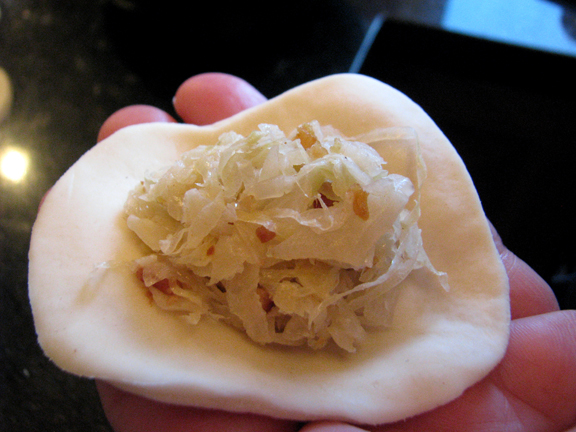
Here’s another look with the sauerkraut filling.
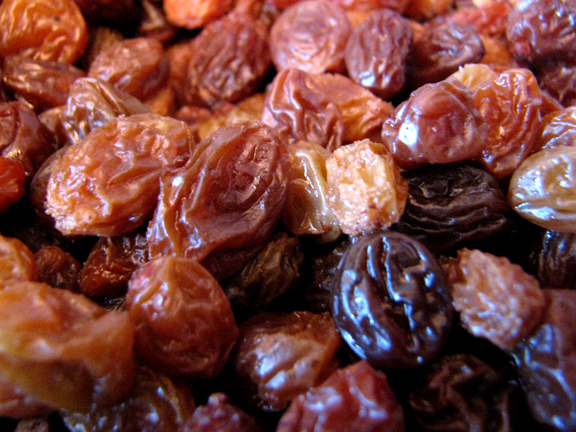
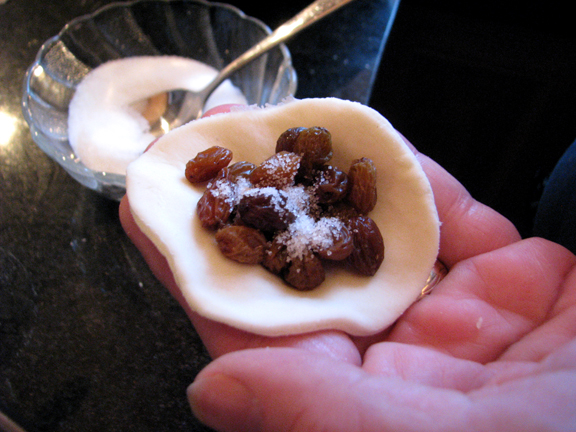
And with the raisin filling.
As you can see, we dust a bit of sugar in this step rather than after cooking the fruit. The fruit becomes too juicy if you do that. Best to sprinkle some on right before you fold them.
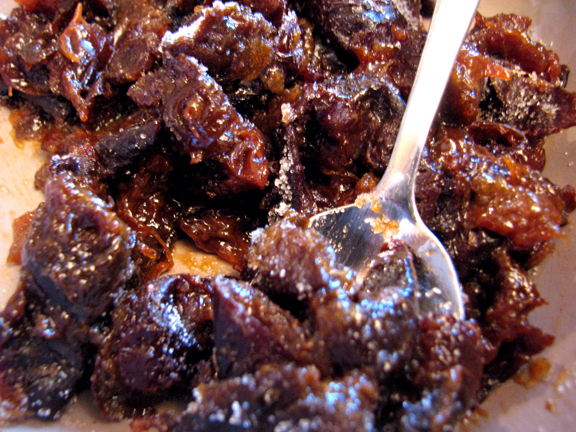
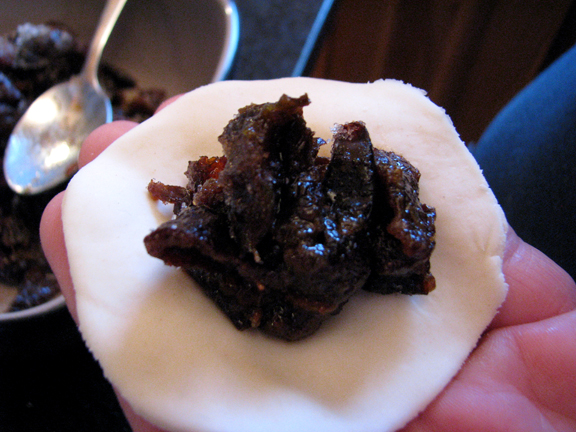
And for the prune filling.
It’s okay to mix the sugar in with the prunes after cooking.
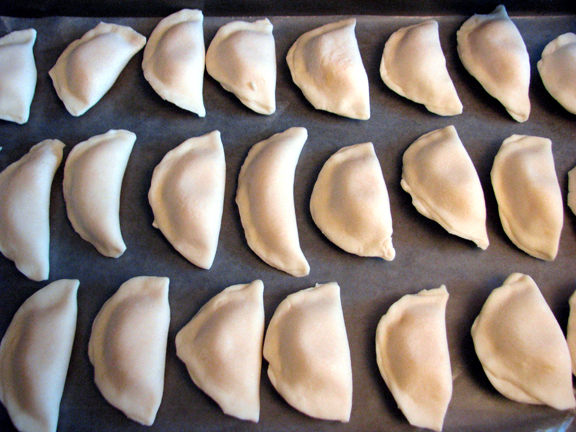
Baking sheet with all your beautifully looking perogies.
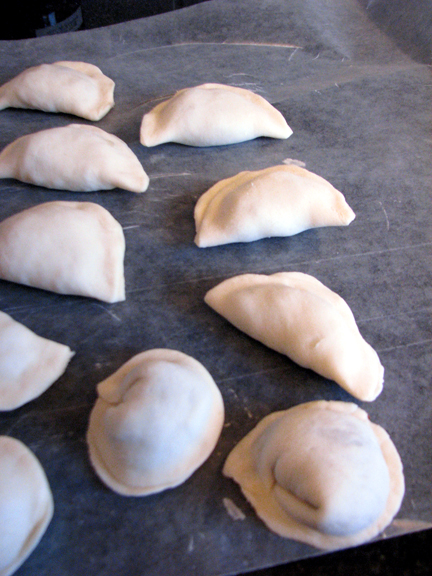
If you are making ahead of time and want to freeze these, line a baking sheet with wax paper and ensure perogies do not touch each other. Place saran wrap over top of the bottom layer and place perogies on top in opposing directions.
When we use any sort of fruit filling (i.e. raisin or prune), we typically create a different shape for them so we know what they are. If you look above, the ends of the perogy are turned in. Those are our fruit ones!
If you don’t do this, you have a harder time distinguishing between them all once cooked.
Now that your perogies are assembled, it’s time to cook some up for a good ol’ fashioned taste test!
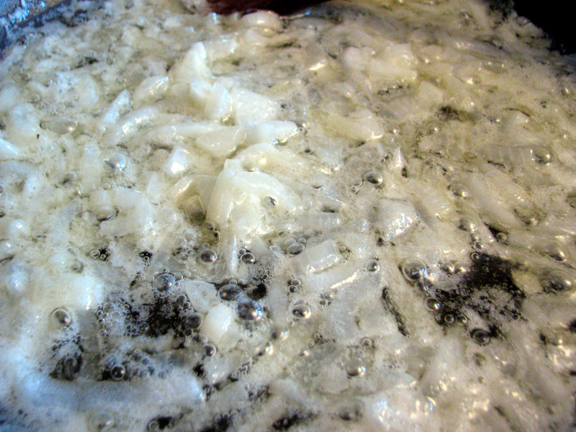
Place some liquid gold (i.e. butter, but you should know that by now) and onions in a frying pan and cook until tender.
In a large pot, bring water, tsp salt and 1 tbsp of vegetable oil to a boil
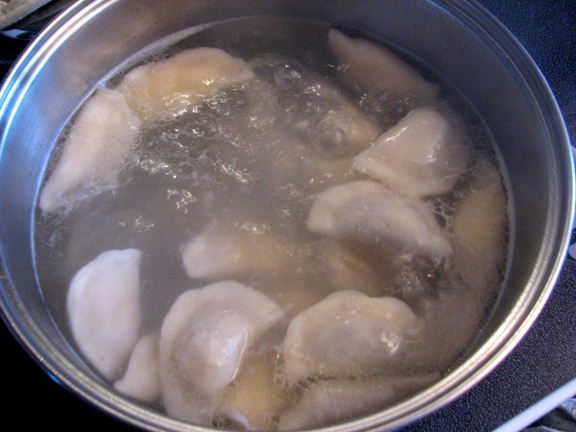
Place perogies in boiling water and gently stir so they don’t stick to the bottom.
Cooking time varies – I’d say about 10 minutes but you want to check them.
There is a theory that once they rise to the top they are done. Not really so…a lot of the time the edges are still raw. Best to just watch and test them accordingly.
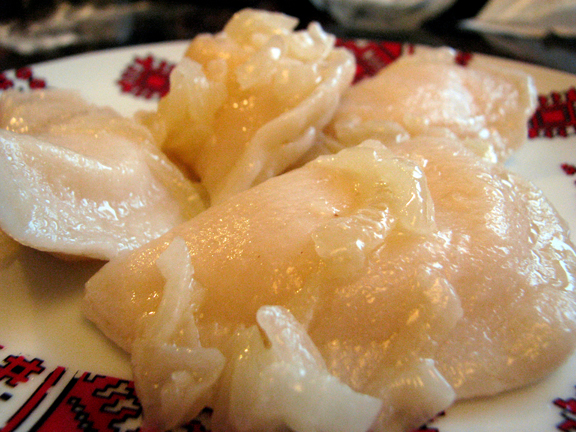
Once done, scoop out with slotted spoon and place in a bowl.
Toss with butter and onions.
And enjoy the deliciousness of the potato and cheese….
…The tanginess of the sauerkraut…
…So delicious…
…and the sweetness of the raisin and prunes…
…Divine!
The ultimate comfort food.
Happy Birthday Baba.
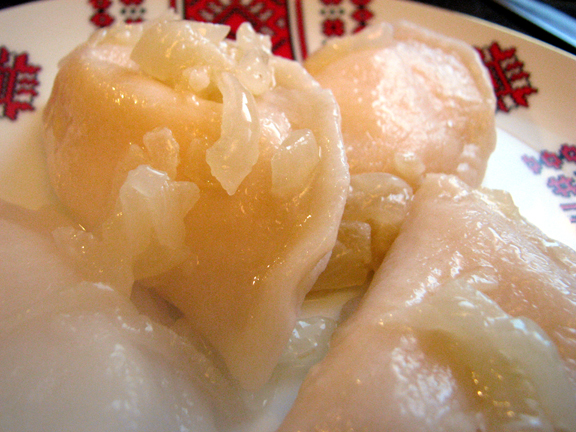

- 8-9 cups flour, plus more for dusting and adding
- 1/2 cup vegetable oil
- 1.5 cups lukewarm potato water
- 2.5 cup plain lukewarm water.
- 1 tsp salt
- 1 medium onion, chopped
- 1/4 cup butter
- 3 cups cooked potatoes, mashed (reserve water used while boiling potatoes)
- 1/2 tsp salt
- 1/4 tsp pepper
- 1 cup grated cheddar cheese
- Saute onion in butter until they are soft, about 5 minutes.
- Add onions to mashed potatoes.
- Add salt, pepper and cheese. Mash well.
- Cool the mixture completely until using as filling.
- Combine the dough ingredients. If you find the dough is very sticky, continue to add small amounts of flour until it easy to work with and smooth. You can also separate it into four quarters and add little amounts of flour to each quarter to ensure it is all consistent and not sticky in the middle. Knead a bit and allow to stand for at least 1 hour before rolling out dough (very important and key to soft dough).
- After your dough has rested for over 1 hour, take a piece of it and begin to roll it out into a thin sheet on a floured surface. (Note – wrap the dough currently not being used in plastic wrap and then cover with a damp towel to ensure it does not dry out.)
- Using a disk-shaped cutter, press out as many circles of dough as possible.
- Place filling in the center of the dough. Be careful not to overfill or have any of the filling touch the edges, as this will not allow for them to adhere and they will break open in the cooking process.
- Fold dough in half over the filling. Pinch edges around.
- Now that your perogies are assembled, place a couple tablespoons of butter and 1 chopped onion in a frying pan and cook until tender.
- In a large pot, bring water, tsp salt and 1 tbsp of vegetable oil to a boil.
- Place perogies in boiling water and gently stir so they don’t stick to the bottom. Cooking time varies – I’d say about 10 minutes but you want to check them. There is a theory that once they rise to the top they are done. Not really so…a lot of the time the edges are still raw. Best to just watch and test them accordingly.
- Once done, scoop out with slotted spoon and place in a bowl. Toss with butter and onions.
- Serve and enjoy!
- If you are making ahead of time and want to freeze these, line a baking sheet with wax paper and ensure perogies do not touch each other. Place saran wrap over top of the bottom layer and place perogies on top in opposing directions.
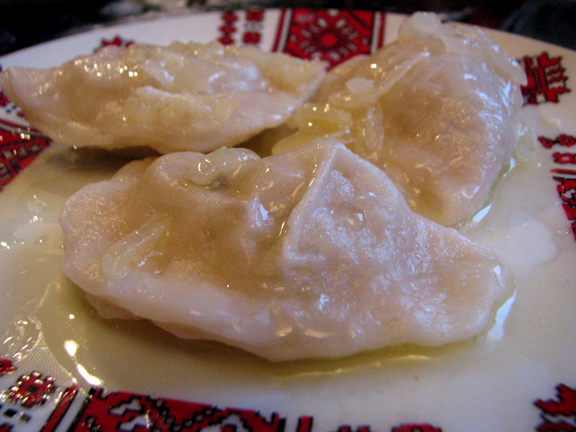

- 1 quart sauerkraut
- 4 strips of bacon, diced
- 1 medium onion, chopped
- 1/2 cup vegetable oil
- 1/2 tsp salt
- 1/4 tsp pepper
- 8-9 cups flour, plus more for dusting and adding
- 1/2 cup vegetable oil
- 1.5 cups lukewarm potato water
- 2.5 cup plain lukewarm water.
- 1 tsp salt
- Cook sauerkraut, about 20 minutes or until done.
- Drain and press out water.
- Saute onion and diced bacon in oil until golden. Add sauerkraut, salt and pepper. Fry for 10 minutes. Cool before using as filling.
- Combine the dough ingredients. If you find the dough is very sticky, continue to add small amounts of flour until it easy to work with and smooth. You can also separate it into four quarters and add little amounts of flour to each quarter to ensure it is all consistent and not sticky in the middle. Knead a bit and allow to stand for at least 1 hour before rolling out dough (very important and key to soft dough).
- After your dough has rested for over 1 hour, take a piece of it and begin to roll it out into a thin sheet on a floured surface. (Note – wrap the dough currently not being used in plastic wrap and then cover with a damp towel to ensure it does not dry out.)
- Using a disk-shaped cutter, press out as many circles of dough as possible.
- Place filling in the center of the dough. Be careful not to overfill or have any of the filling touch the edges, as this will not allow for them to adhere and they will break open in the cooking process.
- Fold dough in half over the filling. Pinch edges around.
- Now that your perogies are assembled, place a couple tablespoons of butter and 1 chopped onion in a frying pan and cook until tender.
- In a large pot, bring water, tsp salt and 1 tbsp of vegetable oil to a boil.
- Place perogies in boiling water and gently stir so they don’t stick to the bottom. Cooking time varies – I’d say about 10 minutes but you want to check them. There is a theory that once they rise to the top they are done. Not really so…a lot of the time the edges are still raw. Best to just watch and test them accordingly.
- Once done, scoop out with slotted spoon and place in a bowl. Toss with butter and onions.
- Serve and enjoy!
- If you are making ahead of time and want to freeze these, line a baking sheet with wax paper and ensure perogies do not touch each other. Place saran wrap over top of the bottom layer and place perogies on top in opposing directions.
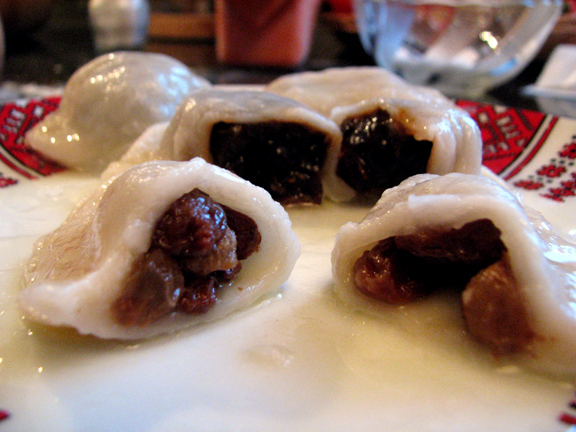

- 1 cup raisins
- 1/2 cup water
- 1/4 cup sugar
- 8-9 cups flour, plus more for dusting and adding
- 1/2 cup vegetable oil
- 1.5 cups lukewarm potato water
- 2.5 cup plain lukewarm water.
- 1 tsp salt
- Boil fruit for 20 minutes. Drain and cool before using as filling.
- Combine the dough ingredients. If you find the dough is very sticky, continue to add small amounts of flour until it easy to work with and smooth. You can also separate it into four quarters and add little amounts of flour to each quarter to ensure it is all consistent and not sticky in the middle. Knead a bit and allow to stand for at least 1 hour before rolling out dough (very important and key to soft dough).
- After your dough has rested for over 1 hour, take a piece of it and begin to roll it out into a thin sheet on a floured surface. (Note – wrap the dough currently not being used in plastic wrap and then cover with a damp towel to ensure it does not dry out.)
- Using a disk-shaped cutter, press out as many circles of dough as possible.
- Place filling in the center of the dough. Be careful not to overfill or have any of the filling touch the edges, as this will not allow for them to adhere and they will break open in the cooking process.
- Dust a bit of sugar onto the raisin filling.
- Fold dough in half over the filling. Pinch edges around.
- Now that your perogies are assembled, melt a couple tablespoons of butter in a frying pan. Set aside.
- In a large pot, bring water, tsp salt and 1 tbsp of vegetable oil to a boil.
- Place perogies in boiling water and gently stir so they don’t stick to the bottom. Cooking time varies – I’d say about 10 minutes but you want to check them. There is a theory that once they rise to the top they are done. Not really so…a lot of the time the edges are still raw. Best to just watch and test them accordingly.
- Once done, scoop out with slotted spoon and place in a bowl. Toss with butter.
- Serve and enjoy!
- If you are making ahead of time and want to freeze these, line a baking sheet with wax paper and ensure perogies do not touch each other. Place saran wrap over top of the bottom layer and place perogies on top in opposing directions.


- 1 cup prunes
- 1/2 cup water
- 1/4 cup sugar
- 8-9 cups flour, plus more for dusting and adding
- 1/2 cup vegetable oil
- 1.5 cups lukewarm potato water
- 2.5 cup plain lukewarm water.
- 1 tsp salt
- Boil fruit in water for 20 minutes.
- Drain, mix in sugar. Cool before using as filling.
- Combine the dough ingredients. If you find the dough is very sticky, continue to add small amounts of flour until it easy to work with and smooth. You can also separate it into four quarters and add little amounts of flour to each quarter to ensure it is all consistent and not sticky in the middle. Knead a bit and allow to stand for at least 1 hour before rolling out dough (very important and key to soft dough).
- After your dough has rested for over 1 hour, take a piece of it and begin to roll it out into a thin sheet on a floured surface. (Note – wrap the dough currently not being used in plastic wrap and then cover with a damp towel to ensure it does not dry out.)
- Using a disk-shaped cutter, press out as many circles of dough as possible.
- Place filling in the center of the dough. Be careful not to overfill or have any of the filling touch the edges, as this will not allow for them to adhere and they will break open in the cooking process.
- Fold dough in half over the filling. Pinch edges around.
- Now that your perogies are assembled, melt a couple tablespoons of butter in a frying pan. Set aside.
- In a large pot, bring water, tsp salt and 1 tbsp of vegetable oil to a boil.
- Place perogies in boiling water and gently stir so they don’t stick to the bottom. Cooking time varies – I’d say about 10 minutes but you want to check them. There is a theory that once they rise to the top they are done. Not really so…a lot of the time the edges are still raw. Best to just watch and test them accordingly.
- Once done, scoop out with slotted spoon and place in a bowl. Toss with butter.
- Serve and enjoy!
- If you are making ahead of time and want to freeze these, line a baking sheet with wax paper and ensure perogies do not touch each other. Place saran wrap over top of the bottom layer and place perogies on top in opposing directions.
77 Comments on Perogies
1Pingbacks & Trackbacks on Perogies
-
[…] don’t know how Claudia can stand in the kitchen for hours on end making dozens upon dozens of perogies at a time. She’s Superwoman. Somebody buy her a […]

Babygirl
December 15, 2010 at 10:41 PM (14 years ago)This recipe really came out great
Naomi (formerly of Winnipeg. now from Edmonton)
December 19, 2011 at 3:31 PM (13 years ago)After my success with your Skor Cake and the cabbage rolls, yesterday my eldest daughter and I tackled the perogie project.
Success Again! We used a brick of Velveeta for the cheese, as my grandma used to, and did 1/2 with your dough recipe and the other half with a sour cream dough. Froze most for Christmas, but the fresh ones we had last night were Fantastic!
Claudia's Cookbook
December 19, 2011 at 3:59 PM (13 years ago)Awesome! So glad you enjoyed the recipe and customized it with the Velvetta! Happy Holidays to you and your family!
Deanna Turetski
July 19, 2018 at 8:54 AM (7 years ago)I have not tried your recipe yet, but definitely will do so. Although I am Ukrainian I am lousy at making perogies. Your instructions are done so well and easy to follow.
Angela @ The Chicken Scoop
February 6, 2012 at 8:03 PM (13 years ago)Hey! I found this post on a google search. This brought back so many wonderful memories of my Baba! She even had the same plate with the red and black design 🙂 I made them a few times with her and could probably wing it and come up very close. She always just made plain potato ones (no cheese) but I loved seeing the other fillings you used. Thanks so much for sharing this!!!
~Ang
Claudia's Cookbook
February 7, 2012 at 9:48 PM (13 years ago)Hi Angela – so happy you found us! Thank you for the wonderful words. I’m glad that you can relate to my family story and of course the food 🙂 Thank you for sharing!
Ann from the North
February 11, 2012 at 3:28 PM (13 years ago)This happens to be one of my best stumble-upons of a website! My quest search of cabbage rolls brought me here. Now I am hooked! I too share my love of my recipes of my family’s past and have created a cookbook that has been shared with over 30 of my family and friends.
I love your blog, recipes and stories. Keep up the great work!
Claudia's Cookbook
February 11, 2012 at 5:42 PM (13 years ago)Hi Ann! First all, congrats on your cookbook! I’m sure it’s a lot of work and you putting that together for your friends and family is a huge accomplishment. Thank you for your very sweet words about our blog. It means a lot to us that we are able to connect with you and can provide some entertainment in the process 🙂 cheers!
Peggy
March 4, 2012 at 6:35 AM (13 years ago)I loved reading about all your different fillings. My father was the pierogi maker in our family. I have wonderful memories of being a small child standing in the kitchen and filling and sealing hundreds of them. My father’s rule was if you don’t help stuff them, you don’t get to eat them! And my favorite thing to do was to steal one from the bowl of finished pierogi behind his back while we were still standing and stuffing. We had a regular factory set up in our big old kitchen. Mom made the dough and gave it to the kids, the kids stuffed and gave them to dad, and dad cooked and placed them into the bowl. We dredged them in butter after cooking to keep them from sticking together.
My father has passed away now and my son and I have taken over the pierogi duties. Well, except for last Christmas. My mother and I surprised the family by making a huge batch and bringing them to Christmas dinner at my nephew’s home. Mom is 93 now, and she worked her heart out keeping up with me. It was our first Christmas together as a family without my father, and we wanted to honor his memory by bringing the pierogi to everyone.
Mom lives with me now, and I will show her your website tomorrow morning when she wakes up. We may have to make a mini batch so we can try your different fillings. My father’s favorite was a sauerkraut, potato, onion, and dill mixture. My mouth is watering at the very thought of them.
Thank you for a walk down memory lane. I really enjoyed your website and plan to mark it and visit again.
Claudia's Cookbook
March 5, 2012 at 12:50 AM (13 years ago)Hi Peggy – thank you very much for taking the time to write such a beautiful comment on this post. I love hearing different family stories around food and traditions, as I can relate to a lot of them. It’s great that you and your son are carrying on the Ukrainian traditions. I also hope your Mom likes our blog! Thank you again for such kind words and for sharing 🙂
Laurie K
March 5, 2012 at 2:23 AM (13 years ago)Thank you for posting all of these Ukrainian recipes! I miss my granny’s cooking so much. I was wondering if you have a recipe for the deep fried prune perogies? Granny used to make them but I think she used a different dough recipe.
Thank you so much for your time and recipes!
jean
December 21, 2012 at 6:13 PM (12 years ago)would sour crot in ca or jars be the same as i can not find any other love your recioies
Claudia's Cookbook
December 21, 2012 at 8:38 PM (12 years ago)Hi Jean, yes canned or jarred sauerkraut is fine. Just boil it first for 10-20 minutes, drain well and fry it up with some bacon prior to using in the perogies. Hope this helps!
Deana Derksen
December 30, 2012 at 8:42 PM (12 years ago)I am going to be celebrating Ukranian Christmas this year with the family. Our parents have all passed on, and I would like the grandchildren to enjoy the culture. I have never made perogies before and was wondering: can I cook them ahead of time, and just have them in a casserole dish? I remember my babba doing this. Will they be okay an not stick if they have the butter an onions between layers? Look forward to your reply.
Claudia's Cookbook
December 30, 2012 at 10:10 PM (12 years ago)Hi Deana! Yes, you can definitely make them ahead of time and freeze them until you want to cook them. In order to cook them ahead of time, you basically place them from frozen in boiling salted water and boil until they float to the top. Once they are done cooking, you place them in a bowl and add your melted butter and cooked onions and ensure all are generously coated. From there, you can either leave them in the bowl covered with aluminum foil, or place in a casserole dish and keep warm in the oven. You may need to flip them around in the bowl or dish a couple times to ensure the butter doesn’t solidify, depending on how long you are allowing them to sit warm. I hope this helps! Merry Ukrainian Christmas and Happy New Year to you!
Anastasiya
January 7, 2014 at 5:08 AM (11 years ago)I am so glad I found your recipe! My mother could not remember the entire recipe and did not want to ask my Baba, so this was wonderful to have to make to bring back memories of being home with my family. I have made it twice now and each time it comes out great. I also made the Borsch which was amazing! It is great to have these comfort foods to make to feel at home on Christmas! Thank you so much, and I hope to see more Ukrainian dishes!! Have a blessed Christmas!
Claudia's Cookbook
January 7, 2014 at 2:43 PM (11 years ago)Hi Anastasiya! I am so glad you enjoyed the Ukrainian recipes! Thank you so much for sharing and I am happy that I could help bring back memories of your family! All the best to you and Merry Christmas!! 🙂
Karen Teters
January 27, 2014 at 10:39 PM (11 years ago)I’ve just gotten back into the habit of making pirohy (many different spellings out there) instead of getting the store bought ones. I did not grow up with them but husband, who is of Polish descent, did. I normally only make potato/cheese or sauerkraut/cabbage ones but I’m ready to venture on to fruit ones. My only question is-anything in particular to top the fruit ones with? Husband enjoys Lekvar with butter drizzled on it but I’d also like to make cherry and blueberry ones. Syrup maybe? Powdered sugar? I’m just not sure. HELP!!
Claudia's Cookbook
January 28, 2014 at 9:55 AM (11 years ago)Hi Karen! In all honesty, we enjoy the fruit perogies on their own and don’t add anything on top. However, warm maple syrup would probably go very well, especially with blueberry and cherry!
Josephine
January 20, 2016 at 2:14 PM (9 years ago)Hi Karen, I love using yogurt could be plain or matching the the fruit inside. ex. blueberry filling, blueberry yogurt.
Brenda
June 22, 2017 at 9:00 AM (8 years ago)Hi Karen, I am mixed heritage, the fruit perogie we made would,get put into a saucepan of melted butter and brown sugar for a minute.
So happy to have found your site thankyou and keep the recipes coming.
Sally
July 19, 2014 at 10:30 AM (11 years ago)Thank you for your recipes.. I am going to try to make them!
Claudia's Cookbook
July 24, 2014 at 9:45 AM (11 years ago)You are welcome Sally! Let me know how you like them!
Mary
September 2, 2014 at 6:26 AM (11 years ago)Love your blog!
It seems that there are as many different ways to make borscht, holupchi and varenyky etc. as there are Baba’s. My mother never put hamburger in her holupchi, only bacon and they were huge compared to others I’d seen made, and I prefer it that way.That way you only need one at a sitting. I also love buckwheat holupchi. They require a little more prep and were therefore considered a delicacy! Her borshct was more rustic, as she cubed the beets instead of grating them. She always used real cheddar cheese in her varenyky too, smothered in fried onions, bacon and browned butter! Either way you look at it, Ukrainian food is hardy and yummy!
Claudia's Cookbook
September 5, 2014 at 12:54 PM (11 years ago)Thanks for sharing Mary! There is definitely a ton of variation. All the more reason to experiment and eat 🙂
Sharaden
October 22, 2014 at 10:47 AM (11 years ago)I just made the cheese & onion perogies this past weekend and they turned out so good! My husband thought they were one of the best he’s tried! Thanks for the excellent recipe!
Claudia's Cookbook
October 23, 2014 at 5:31 PM (11 years ago)Yay! I’m so happy you liked them! Thanks for sharing Sharaden!
Olga Wirlo
December 16, 2014 at 9:09 PM (10 years ago)i pretty much make my Varenyky as in your recipe. My biggest problem, regardless of the amount of butter I use, is them sticking together. They are very difficult to separate once served. Any suggestions? (Oil or Pam used to toss?)
Claudia's Cookbook
December 16, 2014 at 9:14 PM (10 years ago)Hi Olga, we typically toss them in melted butter and serve immediately. If they are sitting for a bit on the counter before serving, just ensure you give them another few tosses to keep the butter from solidifying on them. That seems to work for us and we don’t have any issues with sticking. Also ensure you are putting vegetable oil in the boiling water. I’m sure you are doing that but wanted to mention it just in case.
Helen
December 4, 2022 at 2:13 PM (2 years ago)Try to mix some cooking oil with the melted butter to toss the perogies in , they are less likely to stick together.
Olga wirlo
December 23, 2014 at 9:05 PM (10 years ago)Thanxs. I never have a problem with the first serving, it’s taking “seconds” once they are on the table. The butter has already solidified somewhat & is difficult to separate. I’ll try a little oil & let you know. Ps….your right, I do use oil in the butter. Merry Christmas & Happy New Year to you and your family!
Olga wirlo
December 23, 2014 at 9:07 PM (10 years ago)Sorry, oil in the boiling water is used!
Claudia's Cookbook
December 24, 2014 at 10:10 AM (10 years ago)Yes, we have that problem as well when the perogies are sitting on the table for a while after being served. I guess that just means we have to eat them up faster 🙂 Let us know if the oil works! Merry Christmas to you too Olga!
Robin
January 8, 2015 at 6:01 PM (10 years ago)i have been making perogies myself at Christmas time for 25 years, my kids didn’t like sauerkraut and loved the potato. So one year I mixed the two together. I have been making that filling almost all the time. Nice change in the filling, kids like them now too! ☺️
Claudia's Cookbook
January 8, 2015 at 11:41 PM (10 years ago)Awesome idea! I will have to try it some day! Thanks for sharing Robin!
Rachele
January 13, 2015 at 10:12 AM (10 years ago)This recipe is so amazing we have made and as a family shared perogie recipes except my baba won’t share her recipe lol it’s a gold mine to her and for yearsi have wanted it but it seems to be that your recipe matched hers almost to a T
Claudia's Cookbook
January 13, 2015 at 7:33 PM (10 years ago)Yay! I’m so happy you like our recipe Rachele!! Thank you so much for sharing!
Diane
April 27, 2015 at 2:11 PM (10 years ago)Im so happy you shared your special memories and recipes of your Baba!….I just found this today but I will try them out. I will also be checking out your website for more goodies, Thank you again for sharing.
Diane
Claudia's Cookbook
April 30, 2015 at 12:48 PM (10 years ago)You’re welcome Diane! I hope you enjoy the rest of the recipes on the site 🙂
Cheryl
December 26, 2015 at 8:10 PM (9 years ago)Hi Claudia
I love your recipes. Do you have a cookbook published? If you do where can you buy it? Thank you for sharing.
Claudia's Cookbook
January 5, 2016 at 9:48 AM (9 years ago)We do not have a cookbook. All our recipes are available on the website.
Josephine
January 20, 2016 at 2:25 PM (9 years ago)Hi Claudia,
Could you please help me. I am having problems with cooking them as they break open whether I buy them frozen, Make them by hand cook them first or freeze them first and then cook them or using a perogie frame. I just recently bought this frame so that you can do 18 at a time. I thought it would help as I have problems with my shoulders and arms plus I thought they might seal better. Out of 18 progies 8 broke. Could it be that there is air in the pocket? I have sealed and sealed these wee suckers and some still break. I also boil my water and when I put them in I turn the water down to simmer. Thanking you in advance.
Claudia's Cookbook
January 20, 2016 at 2:30 PM (9 years ago)Hi Josephine, I can’t comment on the perogies you make that are store bought. I’m not familiar with the perogy frame, but it’s simply that they aren’t sealed well enough around the edges, or the dough is a little too thin.
Marta
December 4, 2018 at 7:44 AM (6 years ago)Also, it may be that some of the filling gets in the seam. That makes it difficult to seal properly and they often break open while boiling. When that happens, I discard the dough part and use the filling to make a new one. Several other causes come to me. It may be that you are boiling them too vigorously so a slow simmer might help. You may be boiling them too long, so try to take them out soon after they float to the top. And you may not have enough salt in the boiling water. Salt raises the temperature of the water, so that the seams seal up more quickly.
lori finn
November 7, 2016 at 8:37 AM (9 years ago)Thank you so much for sharing your recipes. I am a Canadian mom who adopted my son many years ago from Brody, Ukraine. Each year at Christmas and on his birthday,I try to make him some Ukrainian dishes to celebrate his heritage. Not being Ukrainian myself, I never had any real luck with making my perogies. I made your borsch and it was great and now I am inspired to attempt the perogies. I wanted to say thanks to you, your mom and your baba for sharing your recipes and traditions. Thay have been very helpful and appreciated by this Canadian mom.
Claudia's Cookbook
November 13, 2016 at 7:05 PM (8 years ago)Thank you so much for sharing, Lori! Your kind words mean so much! Glad you enjoyed the borsch!
Michelle
November 8, 2016 at 4:32 AM (9 years ago)Hi Jamie,
I love perogi and have always wanted to make them myself.
I am a student living away from home so I am cooking for one. I saw that the recipe yields 5 (dozen I assume) and that is way too many for me so I am thinking of my freezing options. I know you mention freezing the perogi after filling it but can the raw dough be frozen without the filling?
If not, is the dough recipe easily halved? Quartered?
Thanks in advance and thank you for the recipes and I look forward to trying some out!
Claudia's Cookbook
November 13, 2016 at 7:04 PM (8 years ago)You can definitely half or quarter the recipe. I wouldn’t recommend freezing the dough and thawing it. Rather, just half the recipe.
Heather
November 29, 2016 at 10:04 PM (8 years ago)Hi Jamie
I too had a Baba that made her whole family very happy with all her wonderful Ukrainian cooking. Unfortunately I never had the opportunity to learn how to make any of them. We lost her when she was 96. I go by taste and test until I can find a recipe that I think will taste like what she made. I am in the process of trying some the ones you have in your amazing cookbook. I am not overly talented in the dough/bread area but I hope to improve this with practice. I love your cottage cheese buns recipe, that is where I am starting. Wish me luck!
Claudia's Cookbook
December 13, 2016 at 10:04 AM (8 years ago)Hi Heather – thank you so much for sharing! Good luck with the recipes and let us know how they turn out!
Denise McLeod
January 7, 2017 at 10:36 PM (8 years ago)I did the fruit pierogies for dinner 150 people , I was worried they would stick together in the crockpot as I had to make a few hours ahead so I fried them in butter and brown sugar YUMMY I think next time I will roll in icing sugar. The left over were great and they did not clump !
Marla
February 21, 2017 at 1:26 PM (8 years ago)I would love to try perogies with a poppyseed filling! Do you have a recipe that you would share?
Chuck
March 20, 2017 at 2:44 AM (8 years ago)Thank you for some great Ukrainian recipes!
This has been our traditional Christmas Eve dinner since I can remember. Potato and cheese and potato, cheese and kraut.
I’m going to make a test batch of the potato, cheese and sauerkraut using your sauerkraut recipe it looks really good.
Claudia's Cookbook
April 2, 2017 at 11:19 AM (8 years ago)Let us know how the test batch turns out!
Lew
April 12, 2017 at 10:05 PM (8 years ago)What kind of potatoes do you use?
Brenda Reid-Bruce
May 11, 2017 at 12:24 PM (8 years ago)My dough was very elastic, when I did manage to roll out when I cut it my discs quickly shrank. Help! Ukrainian family birthday feast quickly approaching! I do enjoy your website and recipes!
Pat
June 20, 2017 at 7:41 PM (8 years ago)I would love to try the Poppy seed. Would you share your recipe? Thanks, Pat
Helen
October 15, 2017 at 7:03 AM (8 years ago)I loved reading this post and all the comments. My son and I are now the pierogi makers in the family. I bring them to my brother’s house for Christmas dinner.
L ynda Glena
November 30, 2017 at 6:23 PM (7 years ago)Am looking for poppyseed recipe for perogies. Hope you can help
Lynda Glena
November 30, 2017 at 6:25 PM (7 years ago)looking for poppyseed filling recipe for perogies
Lisa Dixon
December 18, 2017 at 7:26 PM (7 years ago)Your Pedaheh recipe is amazing. Over the years recipes have changed in my family. However, I do recall my own Baba used potato water and the dough was as smooth as silk. Easy to work with. To you, your Mom and Baba, I extend my gratitude. This recipe is so appreciated and how many folks publish a recipe for Nelynski? Cannot thank you all enough. “An Older gal from Sakatchewan, with Ukranian/Austrian ties”.
Gail
December 19, 2017 at 3:19 PM (7 years ago)I used 9 cups of flour and the dough was very sticky. Since it was the max. amount I let the dough sit for an hour thinking something magical would happen. Dough was very sticky, and even with dusting the dough kept shrinking back. It was very frustrating and a waste of flour. Where did I go wrong? The cabbage roll recipe was very good. Thankyou!
Kyla
September 15, 2019 at 2:40 PM (6 years ago)I had the same problem. Any suggestions would be most helpful!
Mary Saw
December 29, 2017 at 3:42 PM (7 years ago)My sister recommended your site and I am in heaven. As a slavic married to a Ukrainian I try to make as many dishes my husband loves. Your recipes are wonderful and I cannot tell you how special it is for me to be able to look something up and actually make it. Thank you from my heart for sharing your lovely and delicious recipes.
Lojo
January 1, 2018 at 10:52 PM (7 years ago)The perogies were plump and tender…you could cut them with a fork. While cutting the circles, the dough did not shrink. While pinching them, the dough stuck together easily even when some filling got in the way! Truly the very best perogies dough recipe I have ever tried. It’s my favorite.
Lynne Fedorick
January 6, 2018 at 4:24 PM (7 years ago)Absolutely the best perogies ever. We are vegan, so we substituted the cheese with Daiya cutting board cheddar. And we ran out of oil, and live many km from a store, so we used melted vegan margarine in the dough instead. Oh boy, this really made them even better (and they were great before) If I ate butter, I would use melted butter in place of the vegy oil. Thank you for posting these recipes. They are like a bite of heaven.
Destiny
January 12, 2018 at 6:34 PM (7 years ago)Just like my Ukrainian great-grandma used to make!
Thank you so much for posting this recipe!
Richard Tracz
March 30, 2018 at 2:28 AM (7 years ago)Hi I’m of Polish/Ukrainian decent and live in New Zealand, my late mother made pierogi very similar to yours and I now have taken the tradition over and make them for my family, however we have one little difference that I have introduced is to add the Saurkraut, fried bacon and onions together with creamy mashed potatoes. Absolute Heaven. Love your blog. Cheers Richard.
Mary Thompson
October 18, 2019 at 6:08 PM (6 years ago)Do you also have the recipe for the poppyseed Perogies. I would like to try them as well. Thank you
Ilda Mara Batista
May 31, 2020 at 6:20 AM (5 years ago)dear, i loved your blog. You are charming. I am a granddaughter of Ucraíno and I was raised by eating this wonderful food. My grandmother used to make pirogues stuffed with black beans. They are delicious too,
she fried a lot of garlic squeezed in butter, added chopped onion, and when it was well fried, she added mashed cooked beans, frying some more until she got a dough. Salt and pepper to taste.
maybe you guys try it? it’s very good too … a big hug to you here in Brazil.
Claudia's Cookbook
March 1, 2021 at 3:26 PM (4 years ago)Thank you so much for sharing! I’ve never tried it but it sounds so delicious!
Ruth Anne Stokes
January 3, 2021 at 11:09 AM (4 years ago)I have not made perogies since I was a child. I would go to my grandmother’s house and spend the day helping to make these -it’s been about 60 years ago!! She made the potato with cottage cheese, sauerkraut, and plum ones. I remember a huge bowl filled with these on the stove! I would sneak in and grab one with my fingers and eat it! Great memories!! Both sets of my grandparents were from the Ukraine. I plan to use your recipes soon since they are my favorite food! My husband would love the potato ones smothered in butter and onions!
ashok
June 17, 2021 at 1:18 AM (4 years ago)Thanks For Sharing this amazing recipe. My family loved it. I will be sharing this recipe with my friends. Hope the will like it.
Darlena Kureishi
October 30, 2021 at 11:30 PM (4 years ago)For the perogis recipe it says it yields 5. Five what? -pyrogies? For 5 people – how many does each person eat? Five types ? I am just starting out trying to make the dough and do not want to use so much flour as I imagine that makes a lot. So what does the five stand for. How much to divide this recipe to make eg 10 or 20 perogis
Claudia's Cookbook
November 2, 2021 at 10:14 AM (4 years ago)5 dozen.
Eva Oakley
December 14, 2024 at 2:39 PM (5 months ago)I ‘m Swedish but learned to make pierogies 50 yrs ago as my husband was of Slavic descent. I sort of winged it for years but they turn out fairly decent now. I boil and freeze them separately on a cookie sheet. My problem is,I usually fry them and add the sautéed onions but because they have become part of my Christmas smorgasbord and I cannot serve them right after frying.
What is the best way to keep them soft and wonderful if they are not served for an hour. This is a wonderful website thankyou, wish it was available 50 yrs ago. Thank you so much. Eva